2.2 -
Front fork (1100S ABS)
1
Screw
2
Screw
3
Steering head
4
Bottom yoke
5
Left fork leg assembly
6
Right fork leg assembly
Spare parts catalogue
1100 S ABS
Front fork
1100 S ABS
HANDLEBAR and controls
Important
Bold reference numbers in this section identify parts not shown in the figures alongside the text, but
which can be found in the exploded view diagram.
Removal of the front fork (1100S ABS)
Remove the forks as described in the removal of the forks of model 1100 (Sect. G
2,
Refitting the front fork (1100 ABS)
).
Overhauling the front fork (1100S ABS)
Disassembly of the front fork (1100S ABS)
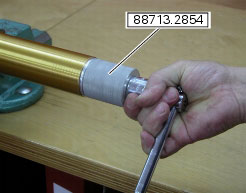
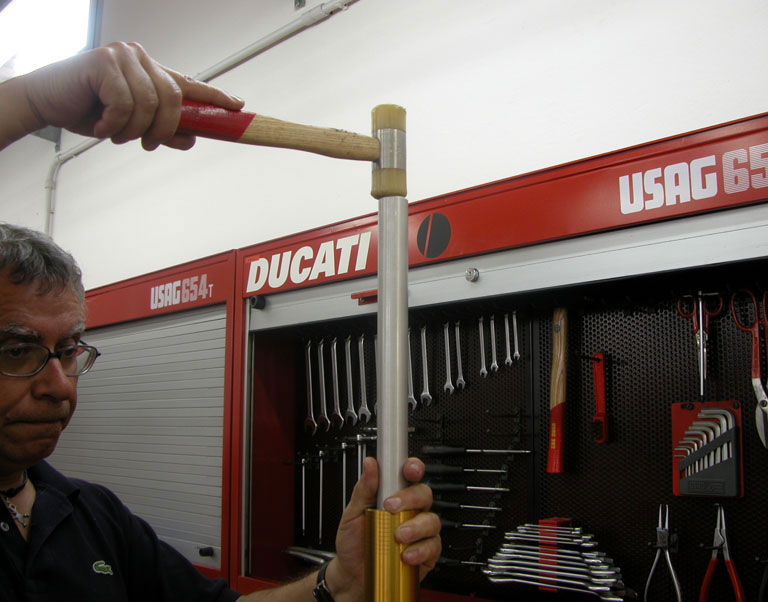
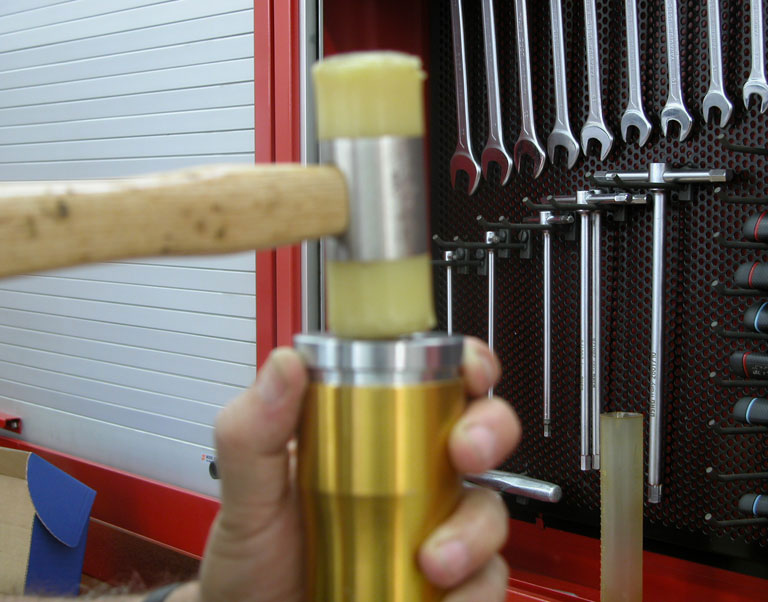
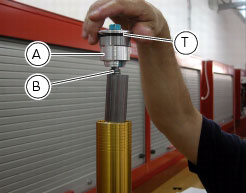
Unscrew the upper plug (A), using service tool no.
88713.2854
.
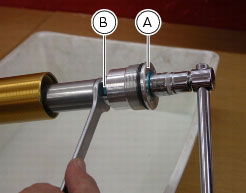
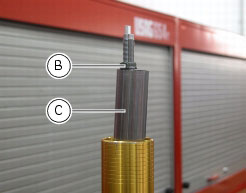
Hold lock nut (B) of cartridge top plug; loosen and remove plug (A) from cartridge.
Remove the spring preload tube (C).
Remove the rebound damping adjuster rod (D) and then the lock nut (B).
Turn the fork leg upside down to let the oil run out.
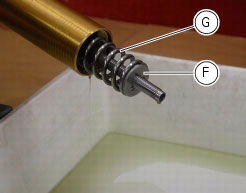
Remove the spacer (F) and the spring (G).
Recover the tapered pin (H) and respective spring (I).
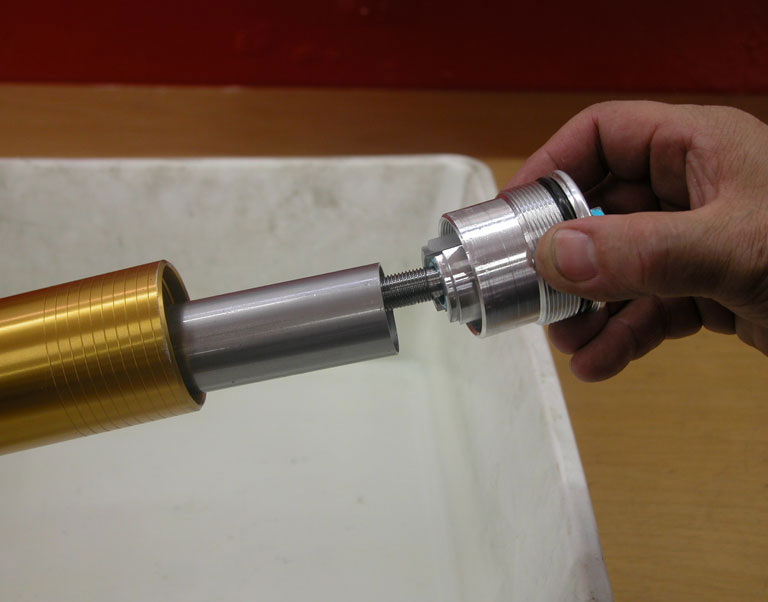
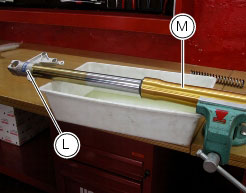
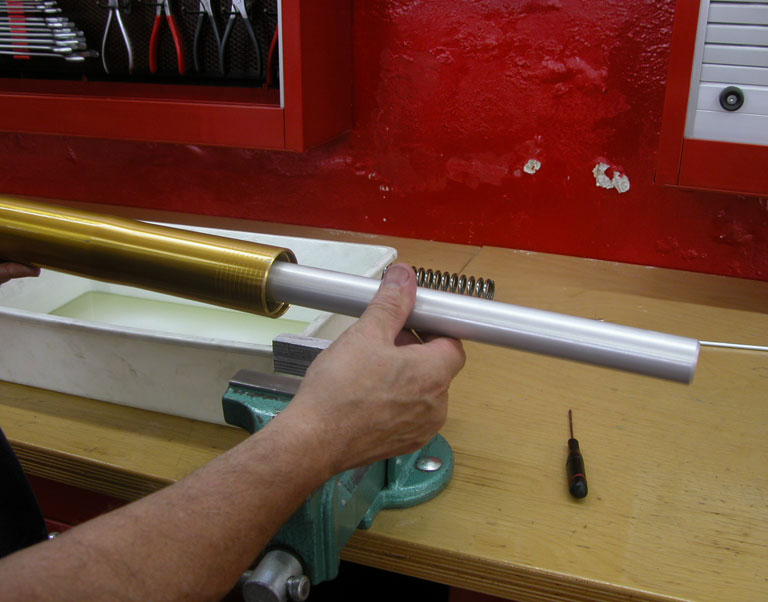
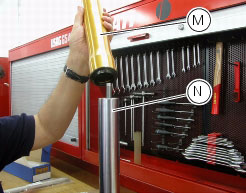
Separate fork leg (L) from sleeve (M).
It is now possible to renew the seals.
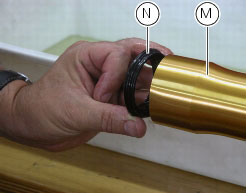
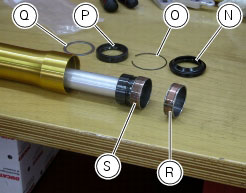
Remove the dust seal (N) from its seat in the outer sleeve (M).
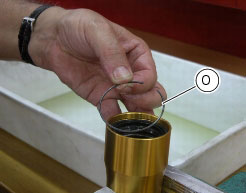
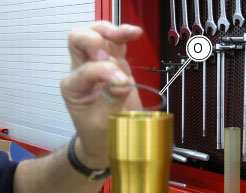
Remove the circlip (O).
Remove the oil seal (P) and the spacer (Q).
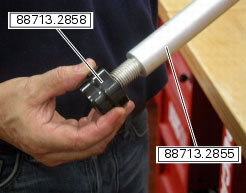
Using bar part no.
88713.2855
installed on bush part no.
88713.2857
, remove the first sliding bush (R).
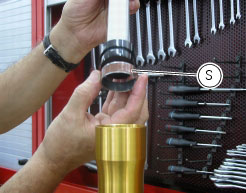
Then remove the second sliding bush (S), using a plastic mallet.
Reassembly of the front fork 1100S
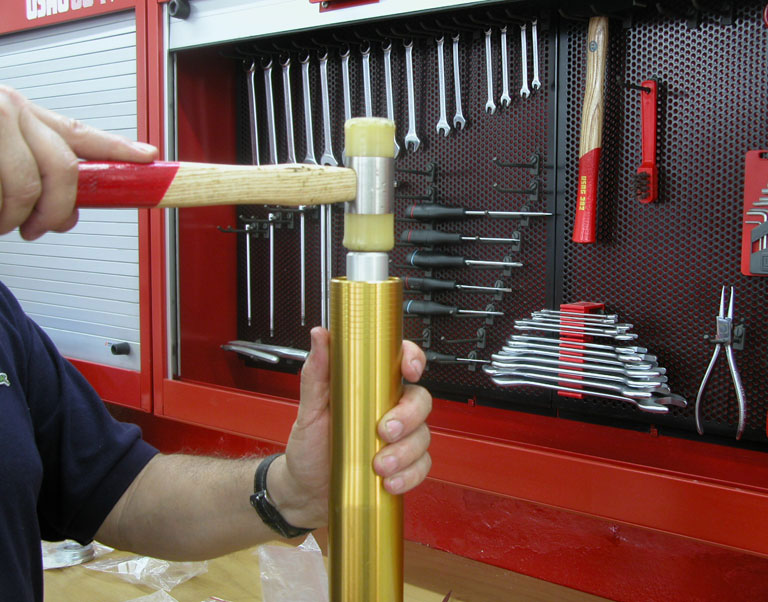
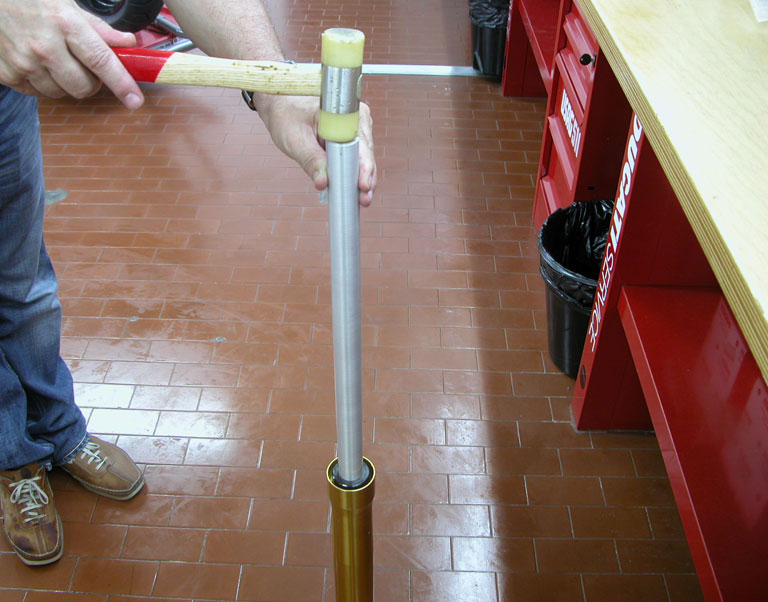
To refit the sliding bushes, install the tool no.
88713.2858
onto the tool no.
88713.2855
, using a plastic mallet.
Warning
Refit the sliding bush with the smaller outside diameter (S) first and then fit the sliding bush with the larger outside diameter (R).
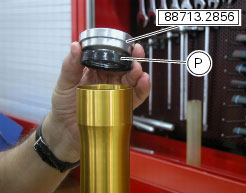
Insert the spacer (Q) and oil seal (P) with tool no.
88713.2856
.
Refit the circlip (O).
Fit the dust seal (N).
It is now possible to join the fork leg (L) with the outer sleeve (M).
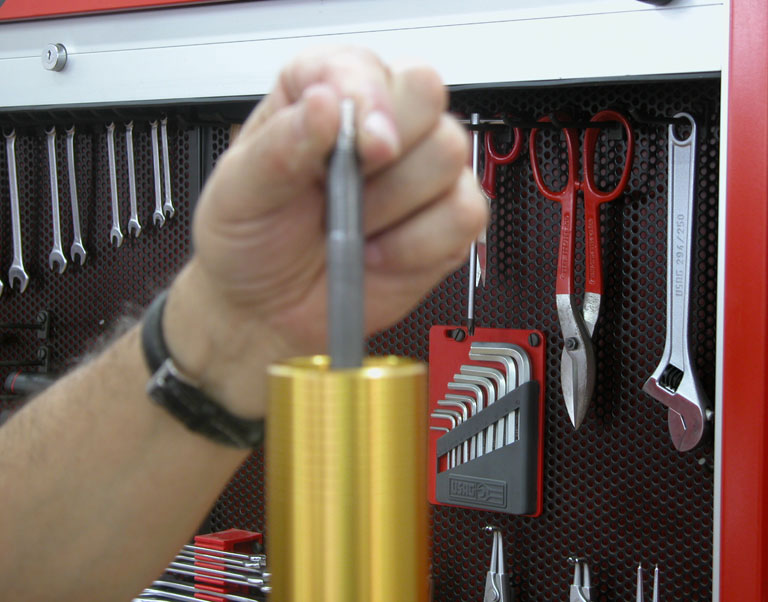
Insert the tapered pin (H) and respective spring (I) in the cartridge and then insert the rebound adjuster rod (D) in the cartridge.
Note
Take care to fit the tapered pin the right way up, with the conical part facing the bottom of the fork.
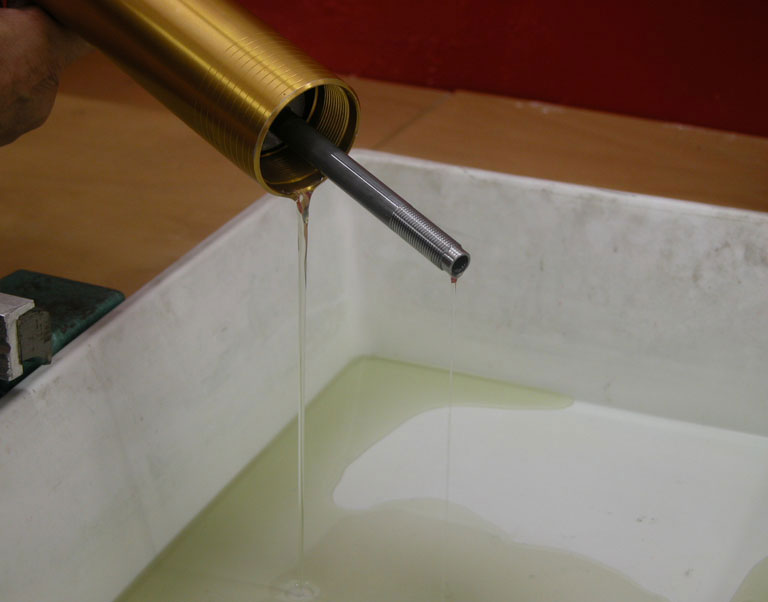
Fill the fork with new oil to the correct level.
Move the cartridge rod up and down until oil comes out.
Insert spring (G) with its spacer (F), after duly cleaning off any oil.
Tighten the lock nut (B) and insert the preload tube (C).
Fit the duly greased O-ring (T) onto plug (A).
Refit the top plug (A) fully home against lock nut (B) and hold the lock nut to tighten plug to the specified tightening torque
(Sect. C 3,
Frame torque settings
).
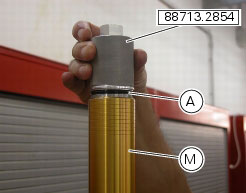
Now tighten the top plug (A) onto sleeve (M) to the specified tightening torque (Sect.
C 3,
Frame torque settings
) using tool no.
88713.2854
.
Refitting the fork (1100S ABS)
Refit the forks as described in the refitting of the forks of model 1100 (Sect.
G 2,
Refit the front fork (1100 ABS)
) positioning the legs at the height shown in the figure relative to the surface of the bottom yoke.