4 -
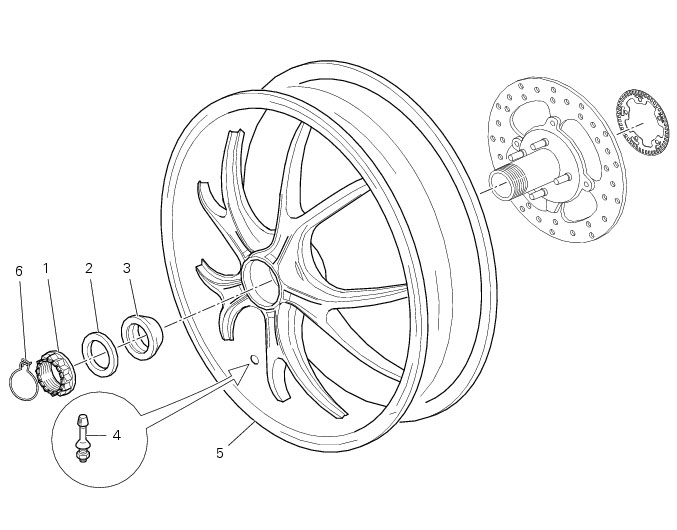
Rear wheel
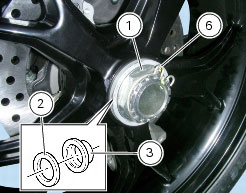
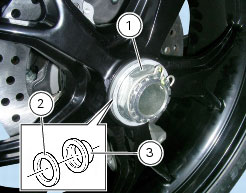
1
Right-hand wheel nut
2
Washer
3
Bush
4
Valve
5
Wheel
6
Circlip
Spare parts catalogue
1100 ABS
front and rear wheels
1100 S ABS
front and rear wheels
Important
Bold reference numbers in this section identify parts not shown in the figures alongside the text, but
which can be found in the exploded view diagram.
Removal of the rear wheel
Place the motorcycle on the rear service stand and engage the 1
st
gear.
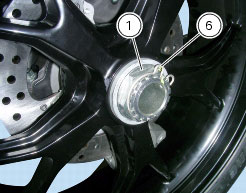
Remove the circlip (6) securing the wheel nut.
Using a suitable socket wrench, loosen the wheel nut (1).
Fully unscrew the nut (1), then slide off the washer (2) and the bush (3).
Remove the rear wheel from the motorcycle.
Overhauling the rear wheel
Inspect the condition of the rear wheel.
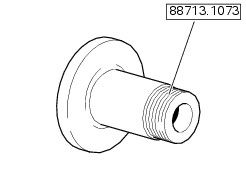
As the rear wheel has no bearings, it should be supported on the service tool part no.
88713.1073
.
Note
This service tool can also be used to install the wheel on a balancing machine.
Overhauling the wheel
Inspect the wheel as follows:
Visually inspect the wheel for cracks, scoring and deformation; change the wheel if damaged.
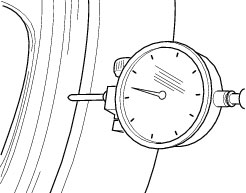
Fit the wheel on service tool no.
88713.1073
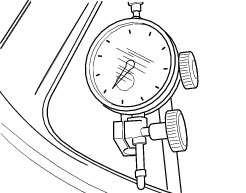
using the original fasteners.
Using a dial gauge, appropriately supported, measure wheel rim runout and out-of-round according to the wheel shaft
(Sect. C 1.1,
Rear wheel
).
If the values measured are not within the tolerance limits, renew the wheel.
Refitting the rear wheel
Clean the mating surfaces and lubricate the threaded end of the wheel shaft with the recommended grease.
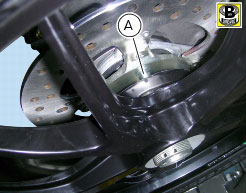
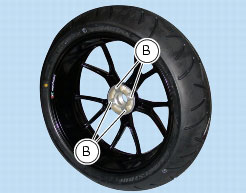
Fit the rear wheel centring it in the shaft and engaging pegs (A) into holes (B) on wheel.
Fit the bush (3) on shaft, setting it with the taper side facing the wheel, fit the washer (2) and insert nut (1) by hand.
Tighten the nut to the specified tightening torque (Sect. C
3,
Frame torque settings
) checking that the hole on the nut is aligned with one of those in the wheel shaft.
Possibly obtain this condition by slightly turning the nut.
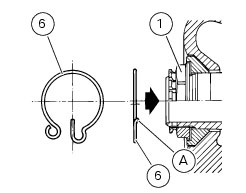
Install clip (6) on nut, with the bent end (A) toward the wheel.
Insert clip (6) bent end (A) into nut hole (1) and wheel shaft hole.
Then push circlip (6) inside nut groove (1).
Operation
Section reference
Check the AIR-GAP
G
9.3,
Adjusting of the AIR-GAP phonic wheel sensor